Python powered Tux ?

Not really, but this nice Tux droid, can be pluged in USB, and the commands are sent via a Python DBUS binding. Hum a stupid question, can we use the Python USB API directly ?

With time, Python really became a powerfull tool for hardware hackers :) That’s perhaps why I like it so much ?

Exalead beta test

I’ve selected to beta-test the latest Exalead web search tool. The previous version, isn’t very user friendly (lot of jscript and colors). This beta looks really well. I like the simple webpage, and the nested search is really cool, and usefull.

The only lack (for me) right now is the orthograph checker … perhaps for the next step ;)

Build a DIY vacuum tube amp ( EL34 / KT88)

I decided to build a tube amp for the fun. In fact I think of that stuff since a really long time now (since the first amp, I ‘ve built ten years ago).

There is a lot schematics on the internet, but finding a good one is pretty hard. I want to build something like that:

  • Good power: 10 Watts seems to be a good starting point.
  • Something simple. I want to build an amp, I can fix by myself. So I decided to build a Single Ended one. (Not a push-pull) Push Pull provide far more power, but need more components and harder to build.
  • Low cost. The best issue for this kind on amp, is the price. You need to buy some output transformers, big power supply transformer and choke. And of course, when we talk about HIFI this cost a lot of money.
  • Look’s good. Something which is important is the way it looks. So I will have to take really care of that.

For people who have never seen this kind a stuff here a little pic I ripped out.

http://www.osbornloudspeakers.com.au/opera/m100se-Bt.jpg

Tubes

For this design, I decided to use some EL34. Check out DrTube[0] for additionnals data. They offer good output power for a decent price.
The reflected load permits to use a KT88 instead if this doesn’t provide enought power.

For the preamp, I think I gonna use a 6SN7 in SRRP. This provide a good gain, and very good linearity.

Output transformers

EL34 has a reflected load of 2KOhm, so I need to find coresponding transformers. Of course this cost a lot of money, Hammond HIFi (not guitar) output transformer for 20w cost something like 99$ each. And
even worst, I unable to find 2.0K only 2.5 are currents.

I found this one:

  • EuphoniaAudio[1] (205$ the pair)
  • Hammond[2] (99$ each)
  • Electra Sud Ouest (86Euros)
  • Elettronocanovarria[3] (75Euros)

Despite, Elett.. offer good price, I unable to buy them here, cause the vendor speack only italian.. and that sucks. Electra sud has a good price too, so I guess I will buy them here if I don’t find anything else.

Update: I found a matched pair of 2.5K / 20W transformators on eBay.

Power Supply

This part isn’t really clear for me right now. Singled Ended amps doesn’t need regulated PSU because they work in pure class A, so the current is fixed (throught the tube bias) but It need to be really stable to avoid distortion.I don’t want to buy a large transformer because they cost a lot of money and doesn’t feet with my needs. EL34 use a quite low voltage (~250v) but need quite a bit of current ~100ma. I think, a good isolating transformer can do the job. Something like 230*230 at 200Va doesn’t cost a lot of money.

Schematic

This is really a hard part. But I found 2 good example:

  • first[4]
  • and second[5]

To be continue… ;)

Howto to get openGL working on Debian (for Google Earth)

3D drivers (openGL) have awlays been a source of problem on Linux.
A lot of people just don’t care, since they don’t use there computer
to play games. But yesterday, something change this fact: Google released
a native version of Google Earth for Linux[1]. As I already played with
Google Earth before, I really want to test this new toy.[2]

Fine, except that I’m unable to get hardware openGL working and Google Earth is
really slow, so I decided to fix that. (done on two computers..)

1) Configure your kernel

Be sure to have AGP (Device drivers->Character device) and DRM (Device
drivers ->Graphic drivers) enabled for your card. Now rebuild it using
the usual way.. and reboot.

After the boot look at dmesg, you should find something like this:

agpgart: Detected 892K stolen memory.
agpgart: AGP aperture is 128M @ 0xf0000000
[drm] Initialized drm 1.0.1 20051102
...
[drm] Initialized i915 1.4.0 20060119 on minor 0
[drm] Initialized i915 1.4.0 20060119 on minor 1
(If you have a Dell computer like D400 with Intel 855GM, you need to
choose the i915 driver for DRM, edit the linux/.config since it doesn’t
appear in common menuconfig)

2) Install the latest Xorg

This is the tricky part, since Xorg update are not really easy this days.

sudo apt-get install xserver-xorg

Let’s go, for a long update… (I’m switching from 6.9 to Xorg 7.0)..
I spent a little time to fix some errors here.. but nothing really important.

3) Install Mesa

Now, you need to install the openGL libs, simple apt-get this packages:

  • xlibmesa-dri
  • xlibmesa-gl
  • xlibmesa-glu
  • mesa-utils
  • libgl1-mesa-dri
  • libgl1-mesa-glx

4) Tests

Start your Xserver, and look in /var/log/Xorg.0.log, you should fine stuff like
this:

(II) I810(0): [drm] created "i915" driver at busid "pci:0000:00:02.0"
(II) I810(0): [drm] added 8192 byte SAREA at 0xe0b2f000

So we can test check with glxinfo

display: :0  screen: 0
direct rendering: Yes
server glx vendor string: SGI
server glx version string: 1.2

Be sure to have direct rendering ok.. if this is ok, .. you can start glxgears..
and Google Earth :) ..

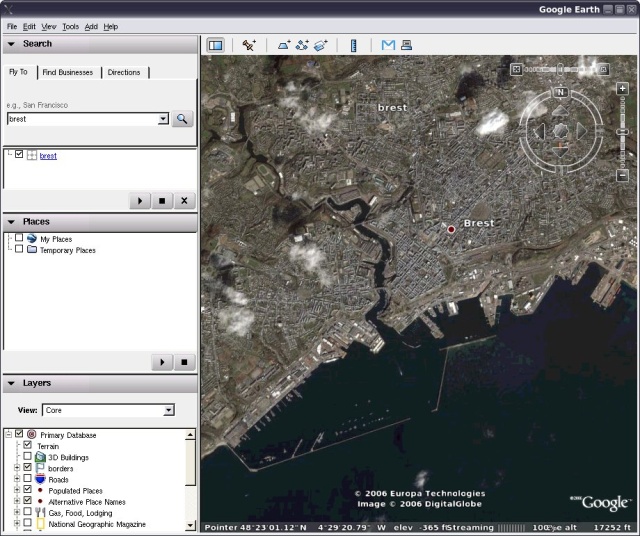
http://jkx.larsen-b.com/photos/blog/google_earth.sized.jpg

5) Issues

Some users have some trouble w/ DRI not working with strange messages
( sizeof(I830DRIRec) does not match …), or strange display updates (out of syncr
windows .. ). This seems to be bugs in Mesa, you can try the latest experimental
(which fix all issues for me). Simply install this packages:

  • libgl1-mesa-dri_6.5.0.cvs
  • libglu1-mesa_6.5.0.cvs
  • libgl1-mesa-glx_6.5.0.cvs
  • Update: Added issues w/ my Dell Latitude D400

    Update2: The latest mesa from the Debian SID is working right now (no more experimental)

    Simple negative power supply (-5V / -12V / -15V)

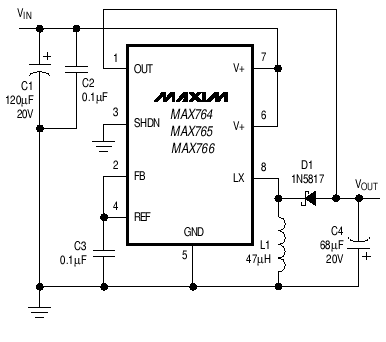
    Sometimes you need a simple negative power supply. The best example is the contrast PSU for common small LCD device. Building -5V from a battery or a wallmart supply isn’t really easy. I decided to build a small device that is able to provide -5V, -12V, -15V. I used the MAX 764/765/766 serie. Simply change the chip to provide the good output.

    Here the little schematic:

    http://jkx.larsen-b.com/photos/Electronic/MAX_764.png

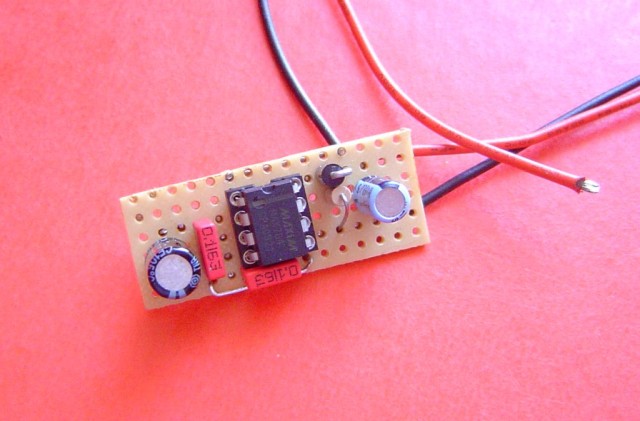
    And here a pic, of the result:

    http://jkx.larsen-b.com/photos/Electronic/DSC02217.sized.jpg

    As you can see, this stuff is damm small, use some common parts and can be reuse across different needs. Thanks Maxim for the sample :)

    I used a 220uF instead of the 120uF one, and a small inductor but you can use a bigger one, if you need greater current.

    Cleaning topics .. in progress

    I spend 15 min to clean up my wifi section. In fact I discover that most people read the post from a google search, but doesn’t spend much time to find other articles on the same topic.

    I get some email for answers found in other articles.. so I decide to clean it up a bit. I guess I will do the same w/ my Electronics section soon..

    Hope not to mess too much stuff..

    I used a old Alinea version which doesn’t have a per topics RSS feed, but perhaps I need to do that ?

    /Enjoy

    intro

    Here is my collection of wifi tests.

    You will find here a lot of stuffs about:

    http://www.brest-wireless.net/albums/AntenneQuads/double_biquad2.thumb.jpg

    Happy reading ..

    AMOS wifi homemade antenna (Second Ed)

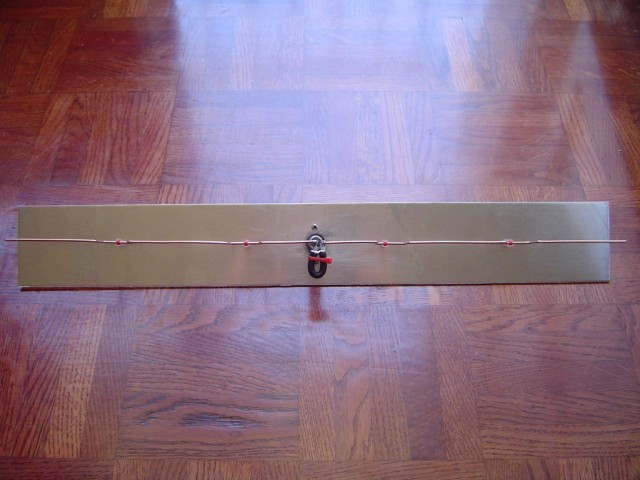
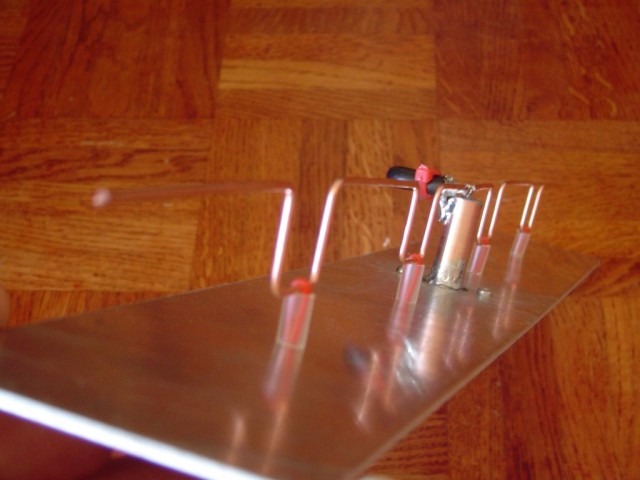
    I already done a AMOS Antenna before but I need to build another one. A bit more robust. I decided to use a N connector, a bit of plumbing.. and here is the result:

    http://www.brest-wireless.net/albums/AntenneAmos/DSC02211.sized.jpg
    http://www.brest-wireless.net/albums/AntenneAmos/DSC02214.sized.jpg

    This stuff, is quite robust right now ;) .. and still have a great gain.

    Please note that there is some new AMOS antenna design ;)

    Check out http://yu1aw.ba-karlsruhe.de/vhf_ant.htm

    Le journal du Freenaute

    Ok, une petite news en Fr ;) ..

    Pour les gens qui lisent les feeds RSS de Freenews, et qui subissent les 15 bandeaux de pub par page… Bah il suffit de changer de site :)

    Donc voila un bon site pour avoir des infos sur Free, et les Freebox HD:
    Le Journal du Freenaute

    Et pour les hackers de tout poil, il y a aussi OpenFreeBox

    Un peu de pub gratuite, n’a jamais fait de mal à personne.

    Nixie clock: “Buy the nixies”

    I decided to build a nixie clock, a long time ago. I finished this stuff, and I decided to write some articles on the way to achieve this.

    So this is the first of a short serie of article, on my nixie clock. Beside I want people to be able to reproduce this for the own purpose, I choose to use some really common stuff, and cheap too.

    The first step, is to buy the nixies and the nixies drivers. Every month, the nixie price tend to be higher .. so..

    I bought some nixies on eBay. This is a good place to find some, at a decent price. Jan have some at good price too. Take care that a lot of website, buy some tubes on eBay and sell them after. (with a very large price increase..)

    So, first choose the type and size of your nixie, Dieter website is the best place to look at the nixie specs. After look at the corresponding prices on eBay. Some users reports receiving broken tubes, but if you choose a serious vendor, you won’t have this kind of problem.

    Here is a couple of pics, on the first nixies I bought. It’s some IN-8-2. They have a good price, a good shape, and quite good size. Bigger nixies cost a lot to much money for me.
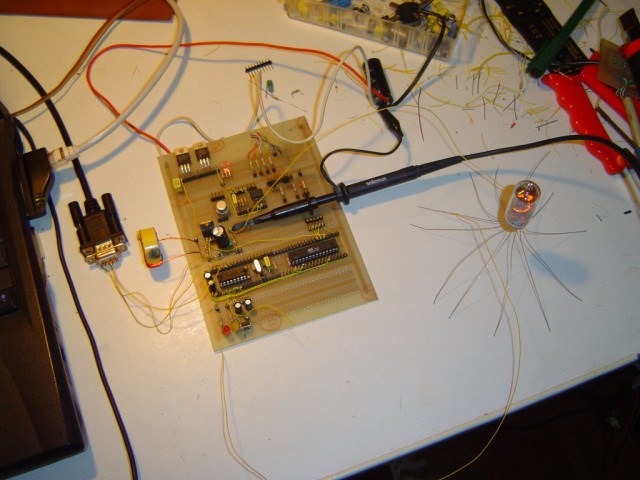
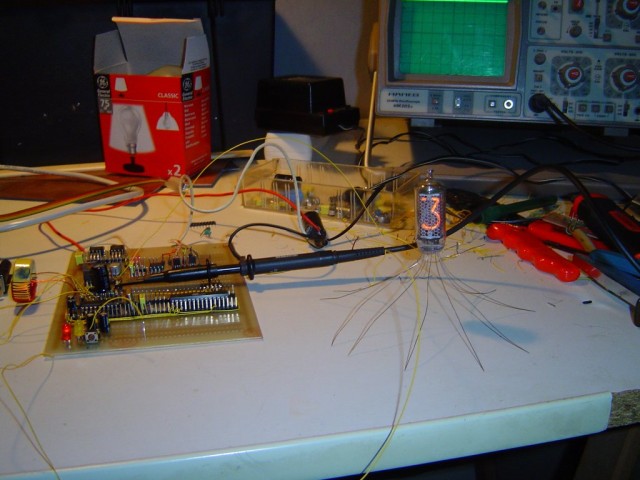
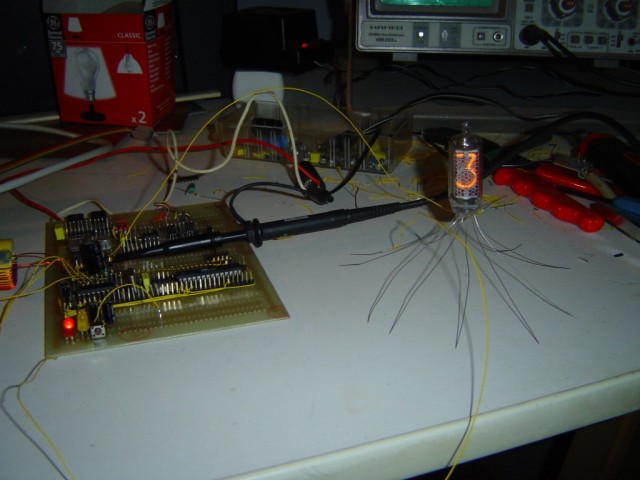
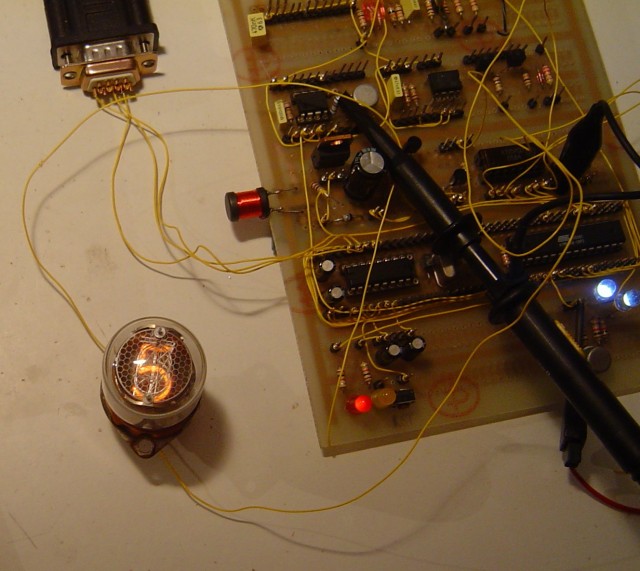
    The next post, will be about powering and testing a nixie with a generic microcontroller and a simple power supply.

    Feel free to ask questions Bye bye..